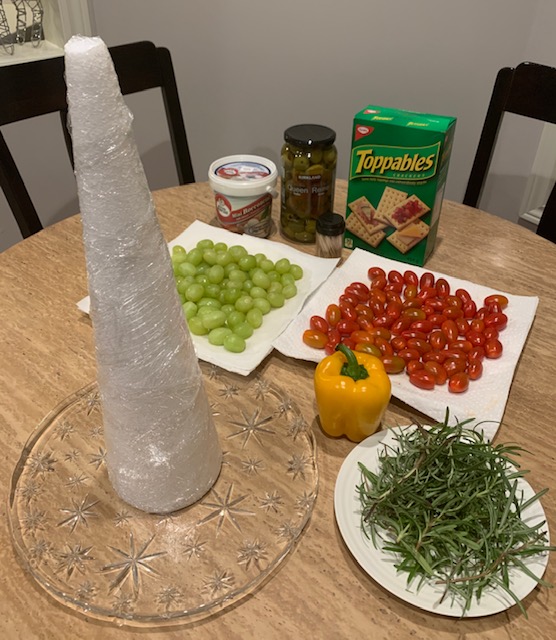
I truly enjoy charcuterie boards, not only whats served on them but how they’re presented. Since it is the season for holiday parties, I thought I would try something different. Themed appetizers made sense, and a 3D Christmas tree would defiantly be eye catching. I wanted my guests to sip on wine and have fun plucking, bite sized food off my tree and pairing it with other appetizers I had prepared. Therefore I quickly made a list of items that would be perfect to put on my tree. Once I had everything on hand and washed I was ready to begin putting this masterpiece together. I used a Styrofoam cone (49in x 178in) and toothpicks just like my chocolate tree from my previous post. This time I wrapped the cone in Saran Wrap since I would be placing food directly on it. I also picked out a platter that would leave enough space for crackers.
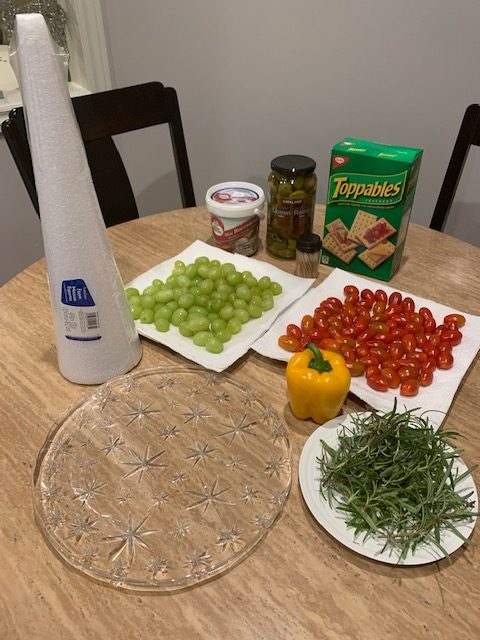
The bite sized food that I thought would work best included, cherry tomatoes, pitted olives, bocconcini and grapes. Some fresh, fragrant rosemary to add that tree feel and a yellow bell pepper to cut out a star as my tree topper. Lastly a box of my favorite crackers that would be placed all around the base of the tree. However the possibilities are truly endless, so many options and ways to create this very unique appetizer. A few side notes to keep in mind. Before I Saran Wrapped my tree, I actually sliced off two inches from the bottom of the cone. I had a feeling it would take me a while to decorate this tree and I was right. In fact, next time I will go with a smaller cone from the beginning. Also make sure your cone fits in your fridge. I’m fortunate enough to have two refrigerators and so I was able to remove an entire shelf to store my tree.

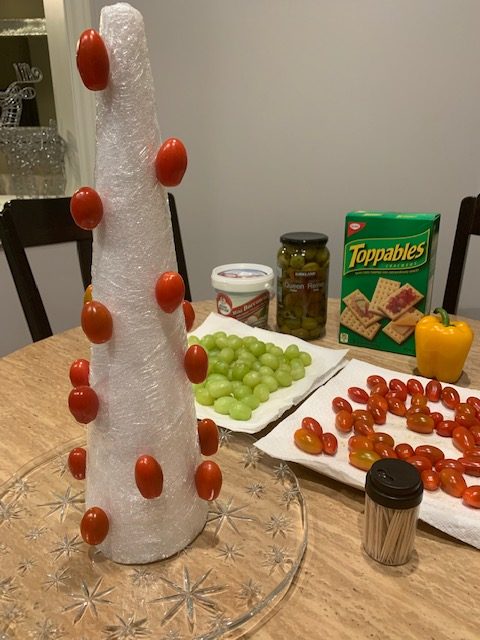
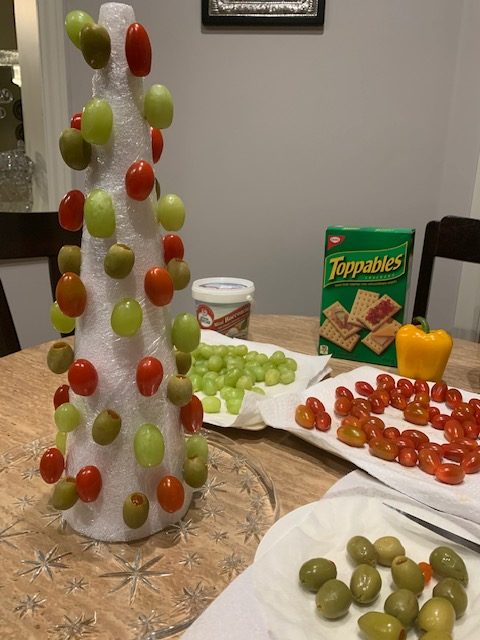
As you can see from the photo above I started with my cherry tomatoes. I actually took a very sharp pointy knife and made an incision in the cone first, then I added the toothpick and then the tomato. I continued doing that all around the tree as if actually decorating a real tree. Realistically you don’t want a bunch of the same ornaments in one spot, instead you tastefully place them around the tree. Same idea applies here, once I thought I was done with the tomatoes I proceeded with the grapes then the olives and lastly the bocconcini.
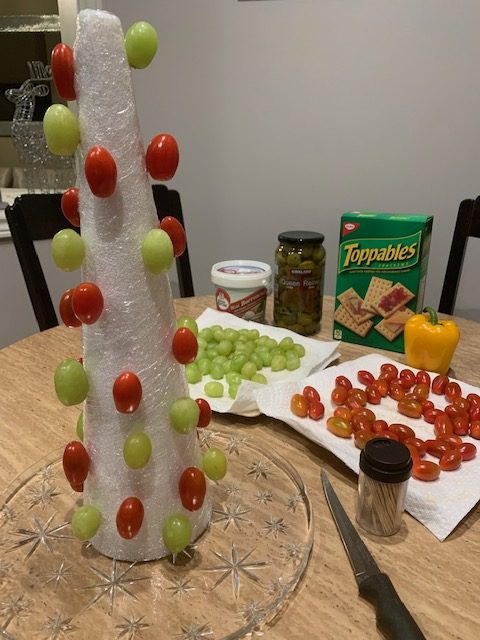
Once I placed enough bocconcini I went back from the beginning and added a bit of everything to fill up the empty spots. You don’t want to see the cone beneath ideally, however if you do have some spots visible it’s OK. That’s where the rosemary comes in, not only does it complete the tree but helps hide those spots. As you can see from the photo bellow I used that same sharp knife to help me push those pieces of rosemary into the cone. I made sure to add the rosemary evenly around the tree as well. Lastly I used my knife and made a star shape out of the bell pepper. You can use a small cookie cutter as well. Then I took another toothpick and stuck it on top of the cone in the center and placed my star pepper on it.


In the end I was very pleased with how my Christmas tree appetizer turned out. Even my youngest daughter enjoyed eating the cherry tomatoes and olives until the very end. This appetizer along with the others, helped start my festive party on the right foot. It defiantly required some work, since I went big and all but it was fun to make as well. Merry Christmas party planing!!!