A couple of weeks ago I posted pictures of my cookies I made for Christmas. Even though Christmas has come and gone, lucky for us cookies are year round. Not to mention, Valentine’s Day is coming and perhaps this post can inspire you to try something different. This year I tried two new decorating techniques for my go to sugar cookies. Both of which I really enjoyed the overall process and was happy with the outcomes. I look forward to decorating some more cookies in the same way for future occasions.
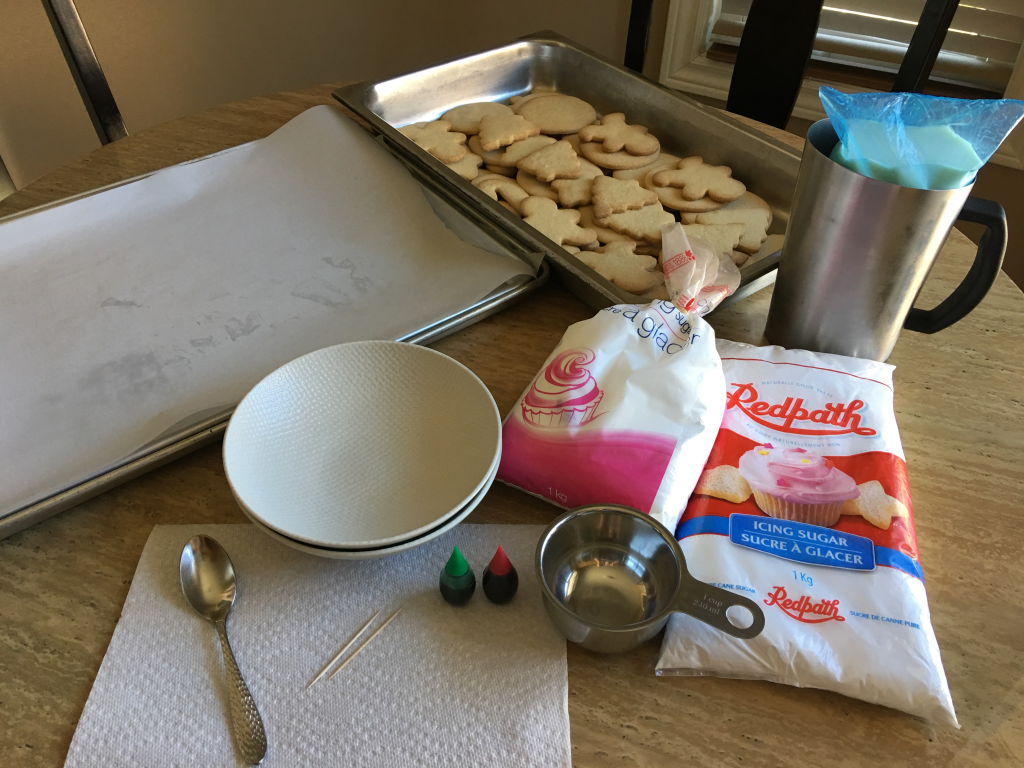
Start off by baking cookies and letting them cool off completely, I usual leave them out overnight. For my sugar cookie recipe go to the menu and search Springtime flower cookies. Next, it’s time to make the icing and begin the decorating process.
Icing Ingredients:
- 1 cup powdered sugar
- 4 tsp 3% milk
- Food colouring
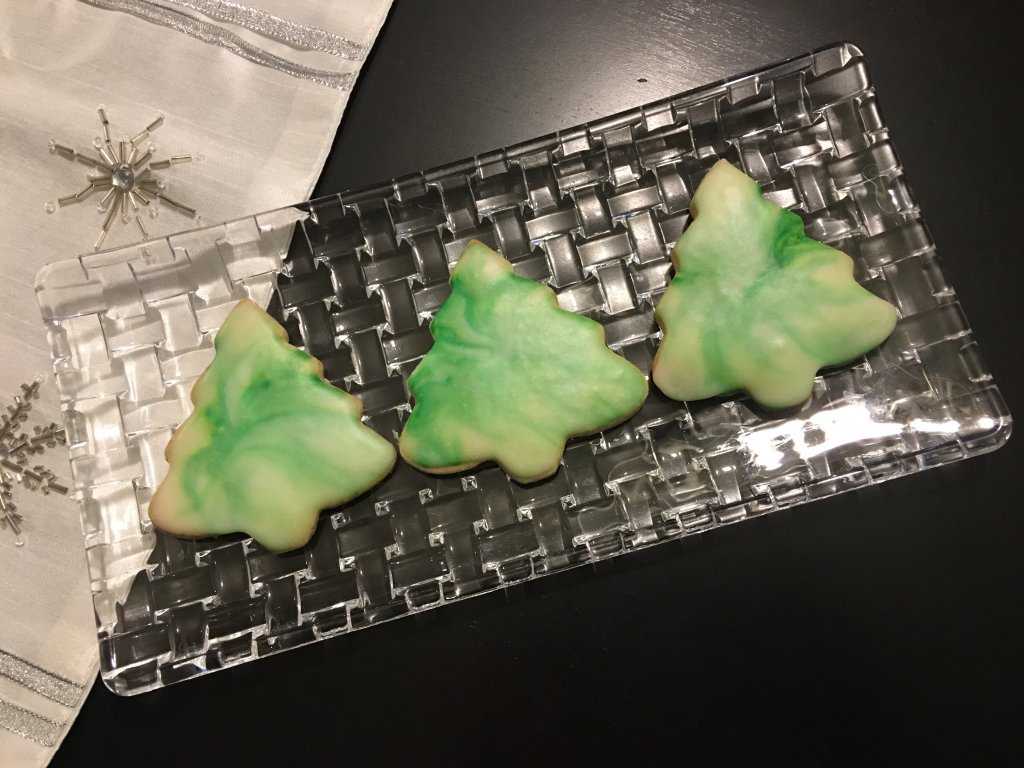
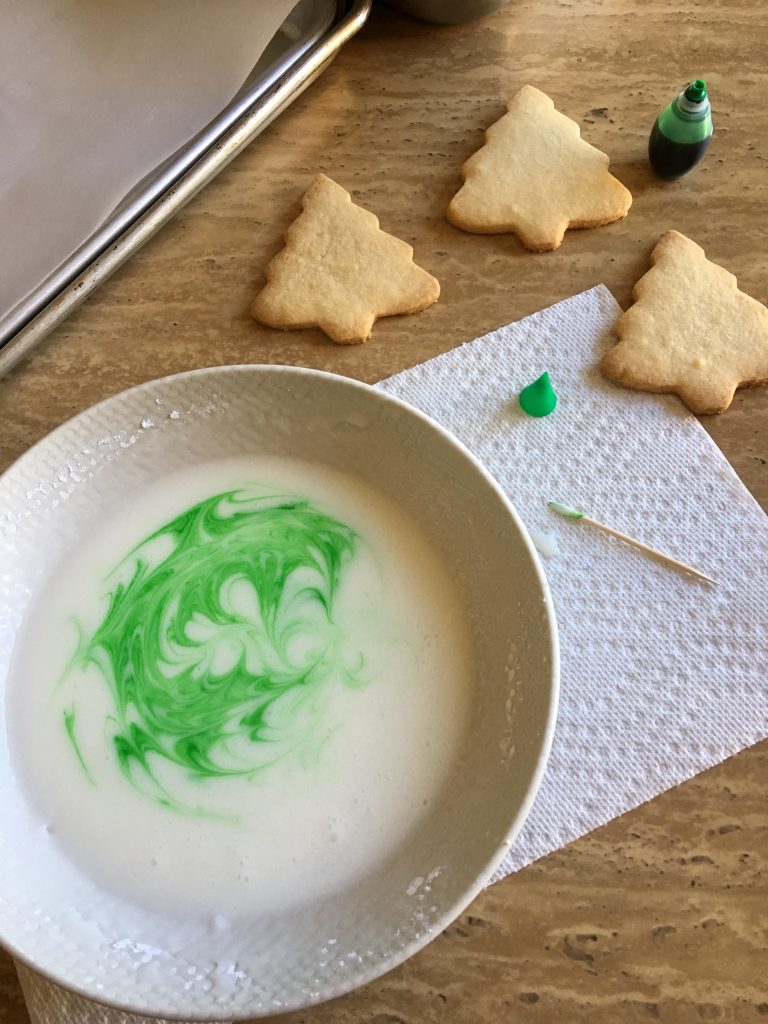
Let’s start with the marble icing technique, I had seen this on Instagram and then looked it up on Pinterest. It looked straight forward and beautiful so I just had to try it out. All you need extra to create the marble effect are some toothpicks. I experimented with red and green food colouring for my Christmas cookies.
I began with green, I placed a drop into my already made icing. From there I took my toothpick and lightly moved the food colouring around to create swirls and waves. The detail created by the toothpick is what gives the cookie that beautiful marble look.
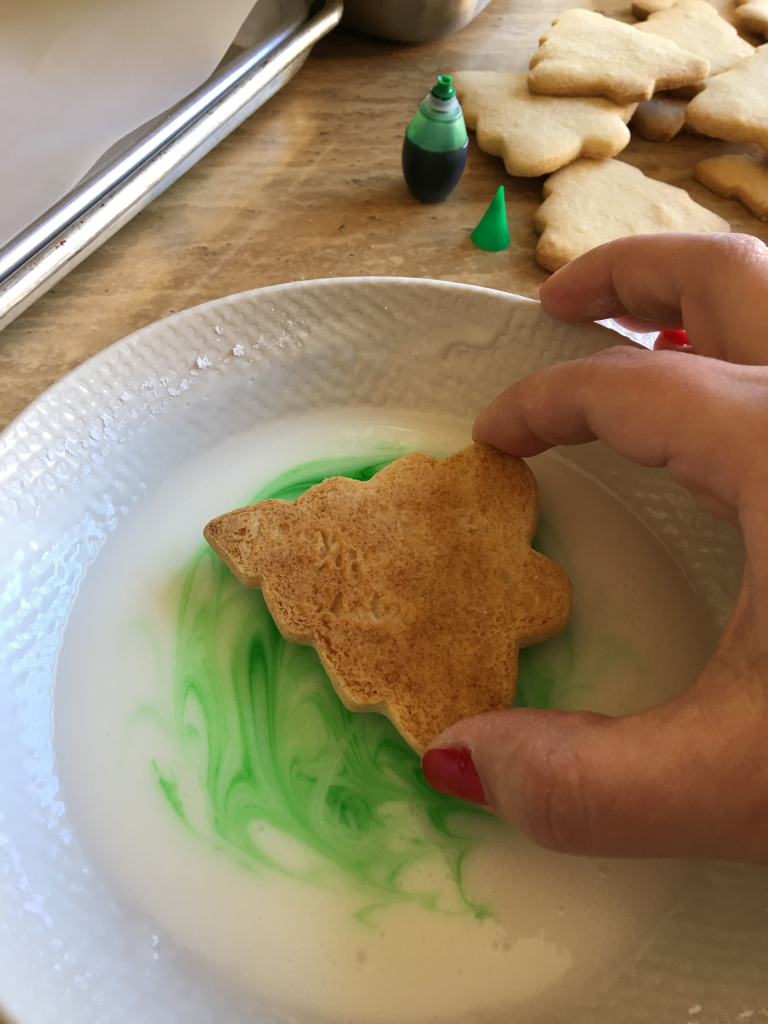
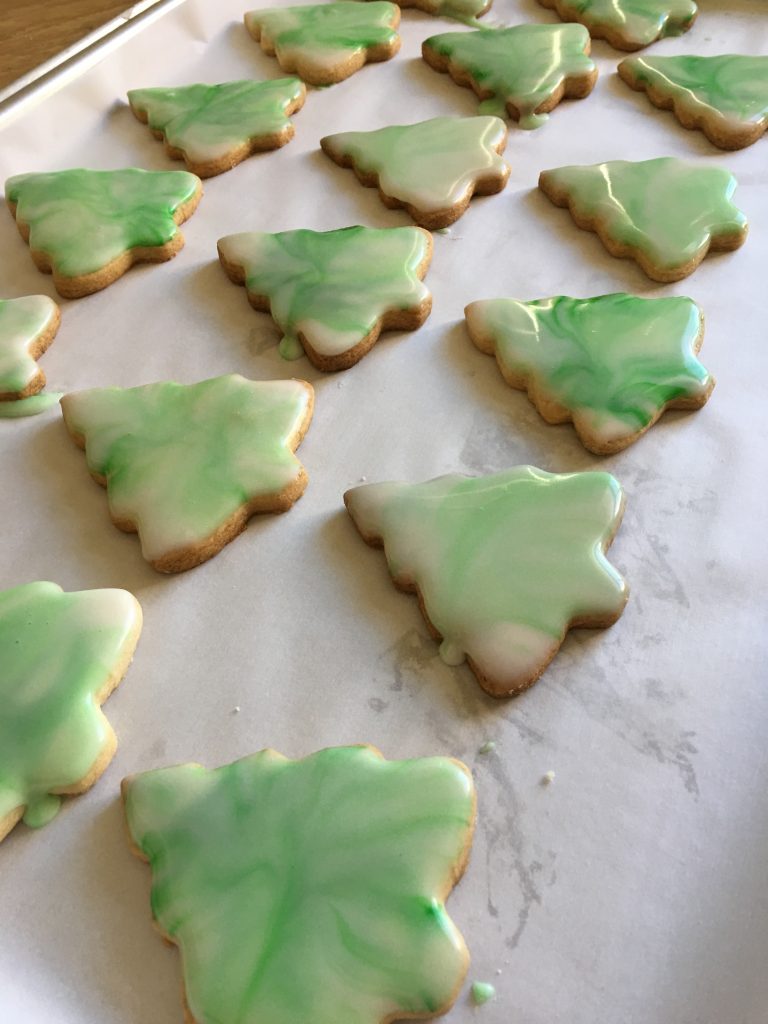
Once I was happy with the design I had created, I took my cookie and carefully dipped it into the icing. I made sure to cover the entire cookie surface and not to submerge it. Then I would lift it up quickly and hover over the bowl for a second or two, this way the extra icing ended up in the bowl. I placed the cookie on a lined pan and continued the process, once again I left them to dry thoroughly overnight. I even tried a two tone marble effect by adding a drop of red food colouring to the green and intertwining them together. This was fun and easy to do as well.
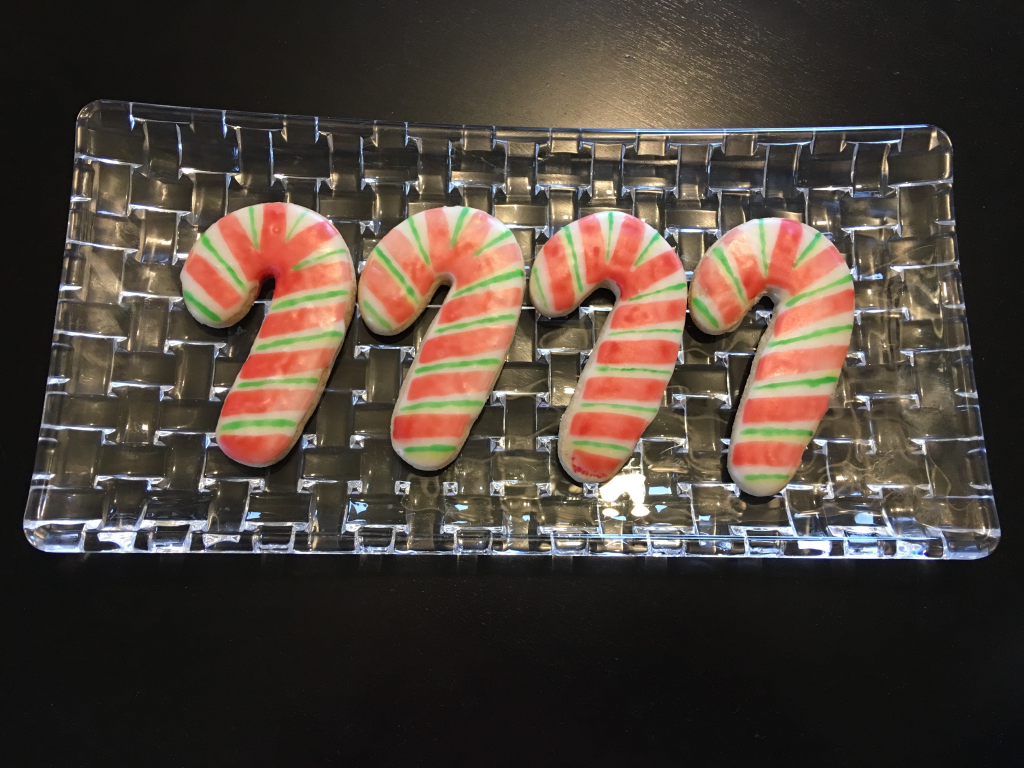
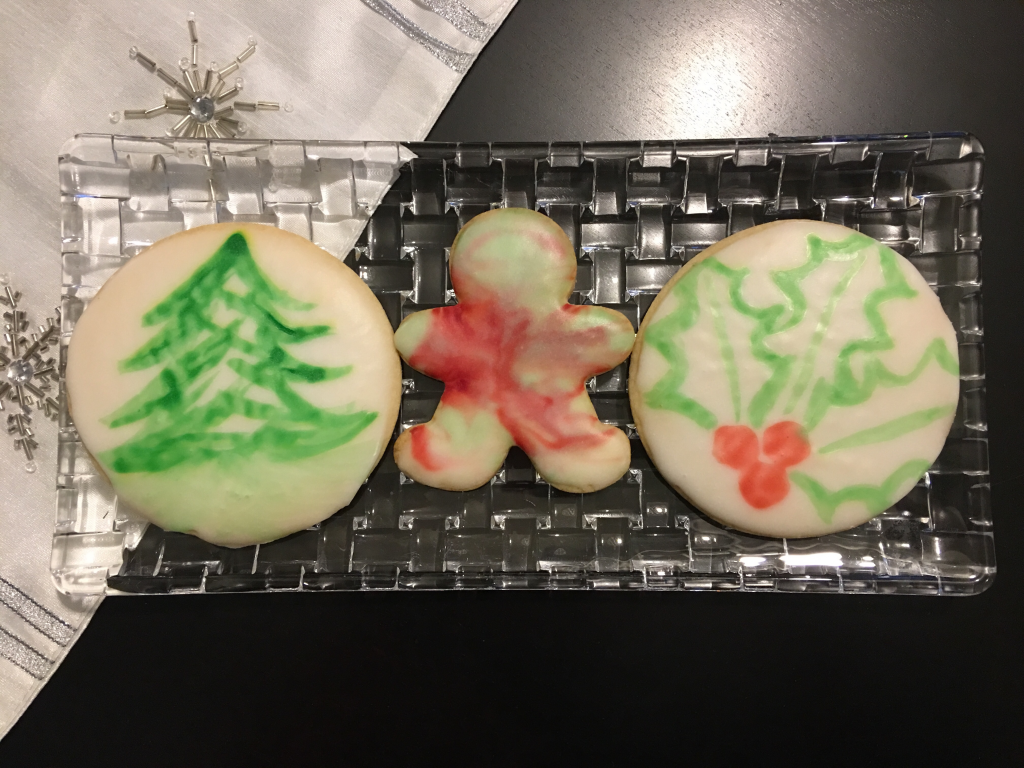
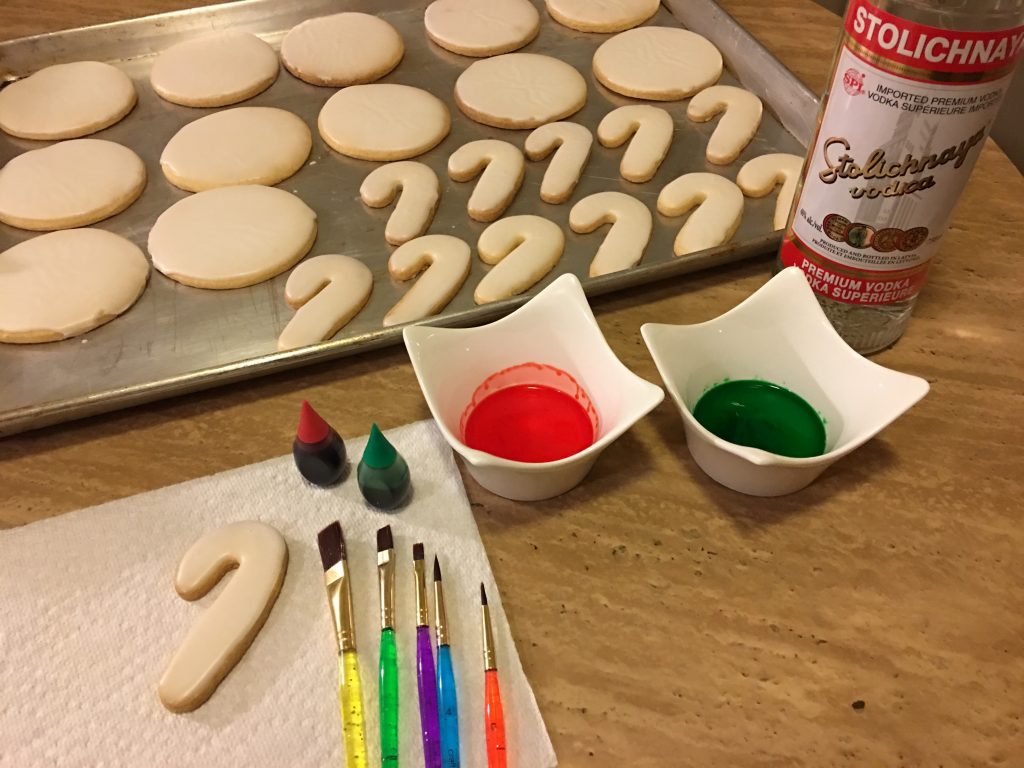
The other cookie decorating technique I tried was watercolour. This called upon my old drawing and painting skills. Though technically, you don’t need to be an artist to do this. In fact I would recommend starting off with simple shapes or lines. First you need to ice your cookies, that way your watercolour art can stand out. I left mine white since I was planning on using red and green food colouring. I decided to try this technique on my candy cane cookies, since all I really had to do is paint diagonal lines. I also purposely baked large circle cookies so that I can attempt to paint something bigger on them.
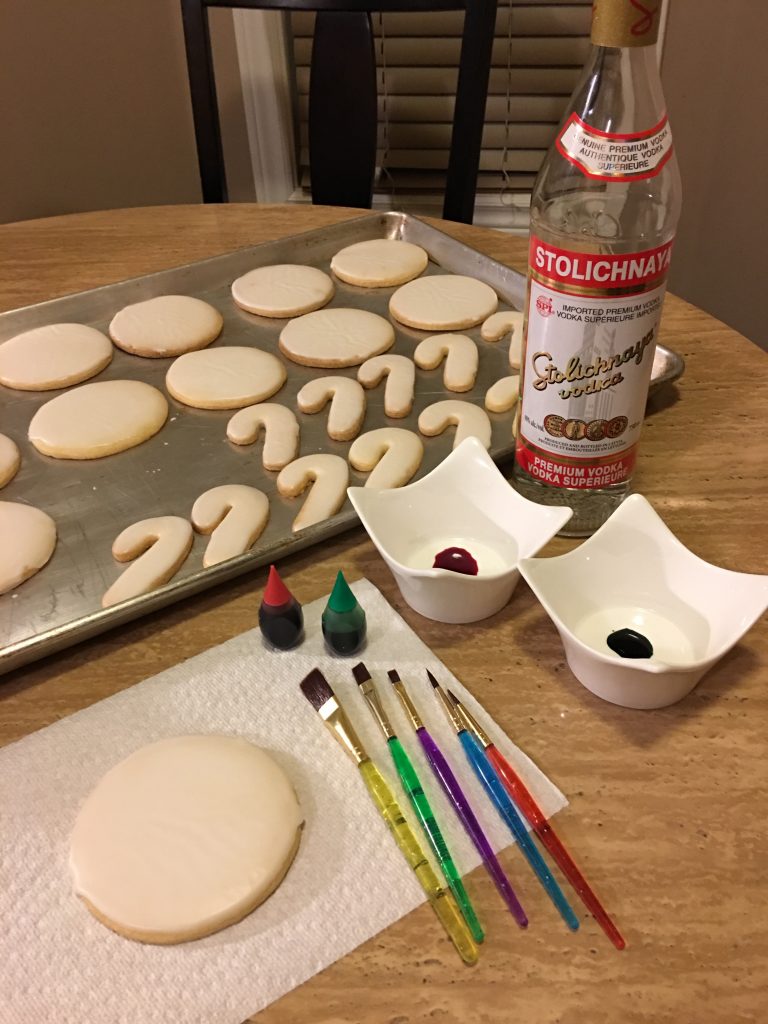
Items required for watercolour:
- Vodka
- Paint brushes
- Food colouring
I placed a few drops of food colouring in separate bowls, from there I added a few drops of Vodka to dilute it and then I mixed it. Keep in mind the more Vodka the lighter the colour and more translucent. Using Vodka also helps your watercolour art dry faster. If your concerned about using Vodka I can assure you that there is no smell or taste left on the cookie.
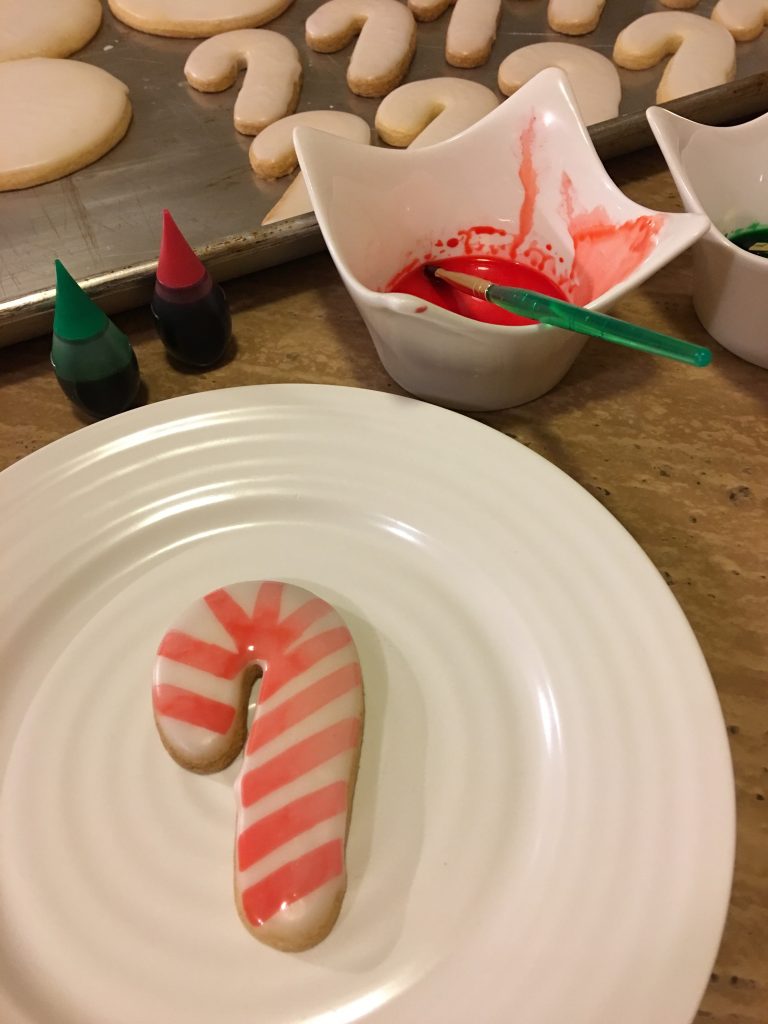
Once I had my desired mixture, I selected my second widest bristle brush to make red lines on my candy cane first. I would dab the brush into the mixture and then press it slightly against the edge of the bowl to release access colour. Then I carefully went around the cookie starting at one end and dipping into my mixture ever so often. That way the consistency of colour is the same with each stroke of the brush.
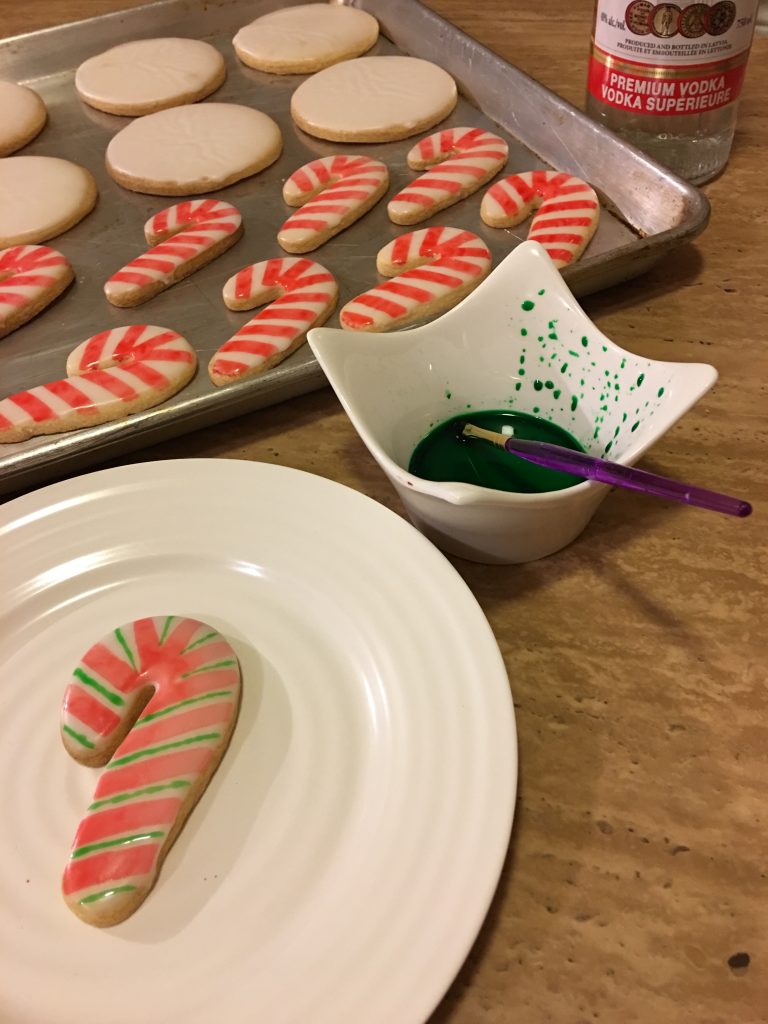
Once I completed that to all my candy cane cookies, I then proceeded with my smallest wide brush to paint on thin green lines. You can also use your fine tip brush for this as well, but I simply just held my brush horizontal to make thin lines in between the red ones. Thus creating the iconic candy cane appearance.
As I mentioned in the beginning I would defiantly try both of these decorating techniques again. I hope to improve with each attempt and as always add my personal spin on them. I already have some ideas circling in my mind for Valentine’s Day, who knows there might be photos on that soon enough.