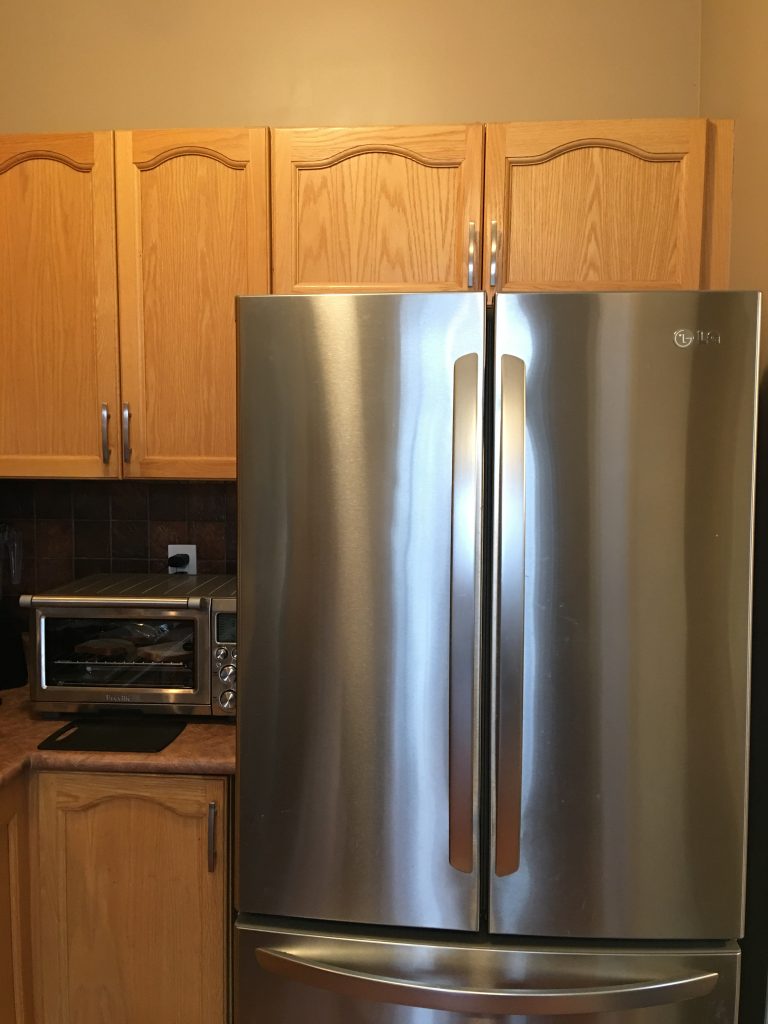
As I mentioned last week, we’ve been working on some home improvements. Truth is, before we moved into our house my husband and I decided to renovate, as much as we could. Brand new hardwood flooring, trim and lots of painting to name a few items we completed. Not to mention all the new furniture we needed, such as tables, sofas and chairs. Therefore our upstairs bathroom and kitchen was left as is, to be renovated in the future some time. In the meantime my husband and I had our two girls and he renovated our basement. However to be honest, I’ve never liked our kitchen from day one. Since I was a Kitchen Designer, I knew exactly what was required and the cost to do a renovation such as that. My expensive taste wouldn’t help either, so it made sense to leave it as is and just give it a fresh coat of paint.
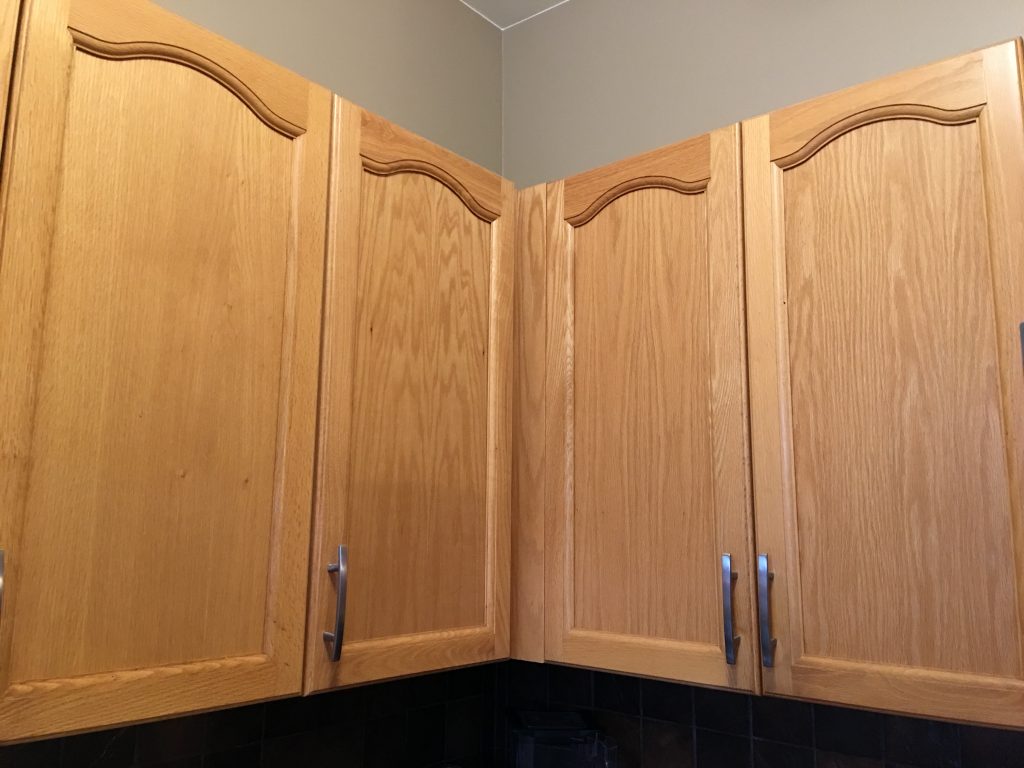
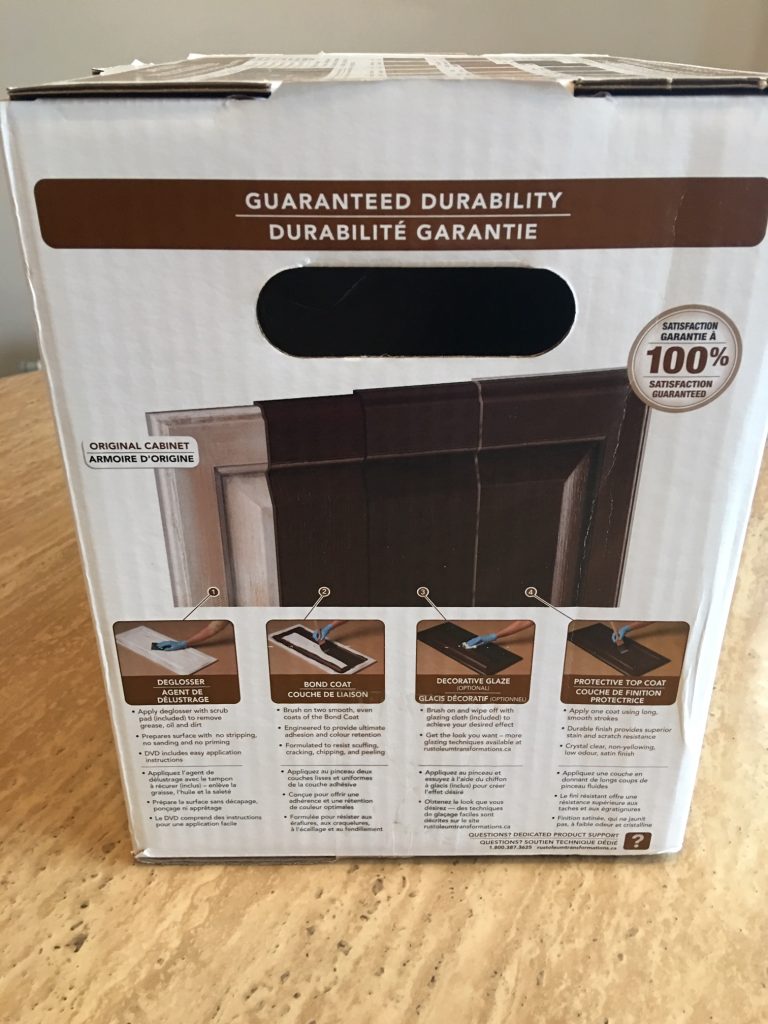
Fast forward to now, it was time to do something about it. Still not ready for a full blown kitchen renovation but something to last until then. I already knew of a kit from RUST-OLEUM, a Cabinet Coating System to be exact. I thought this could be the solution to giving our kitchen cabinet’s a facelift by simply changing the colour. Yes, I would have to live with the arch door-style, but anything was better then the champagne, oak doors. Some of the doors looked especially terrible because of water damage. Having small children constantly touching the base doors didn’t help either. You can find this kit at your local big box hardware store, in the paint department.
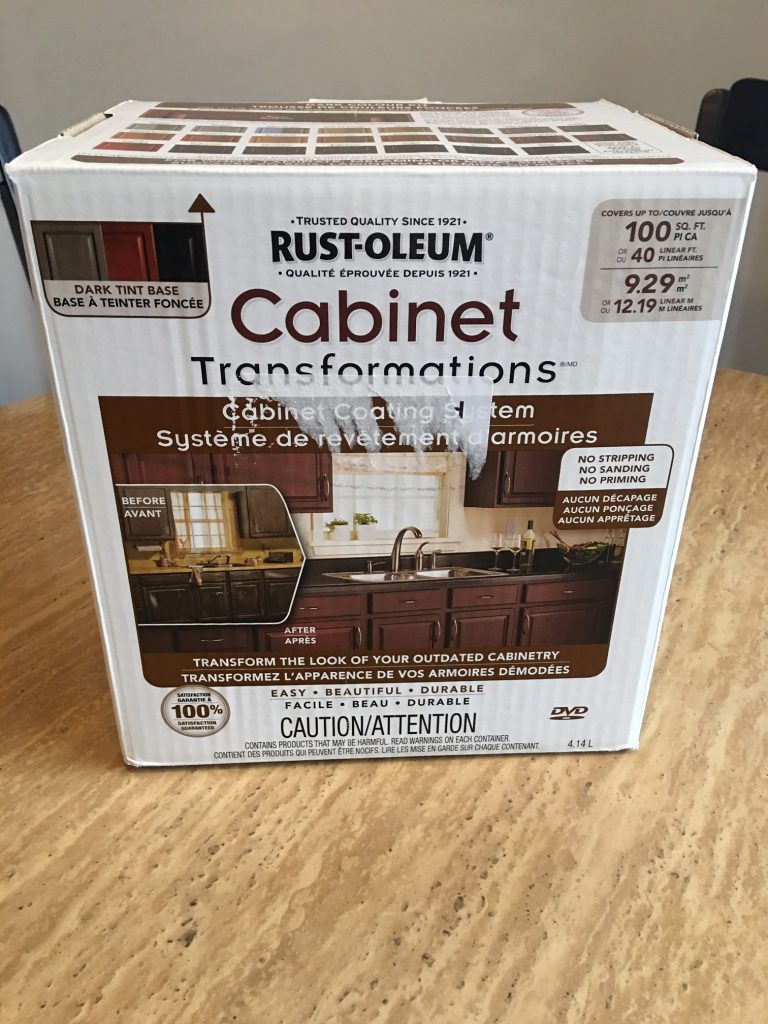
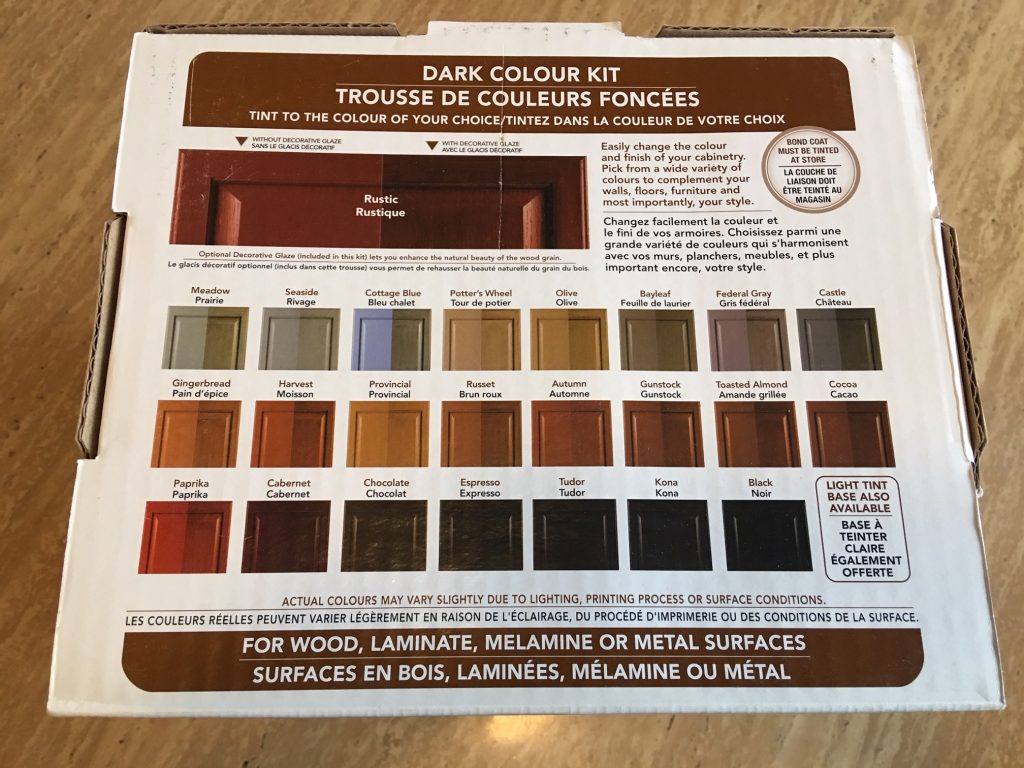
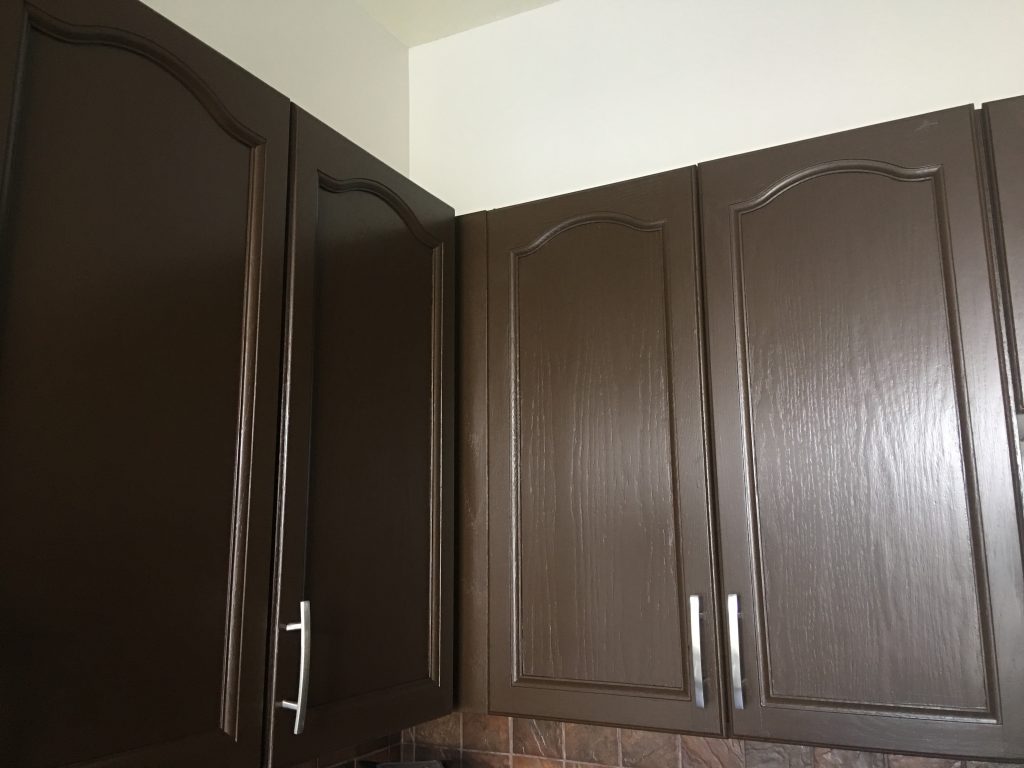
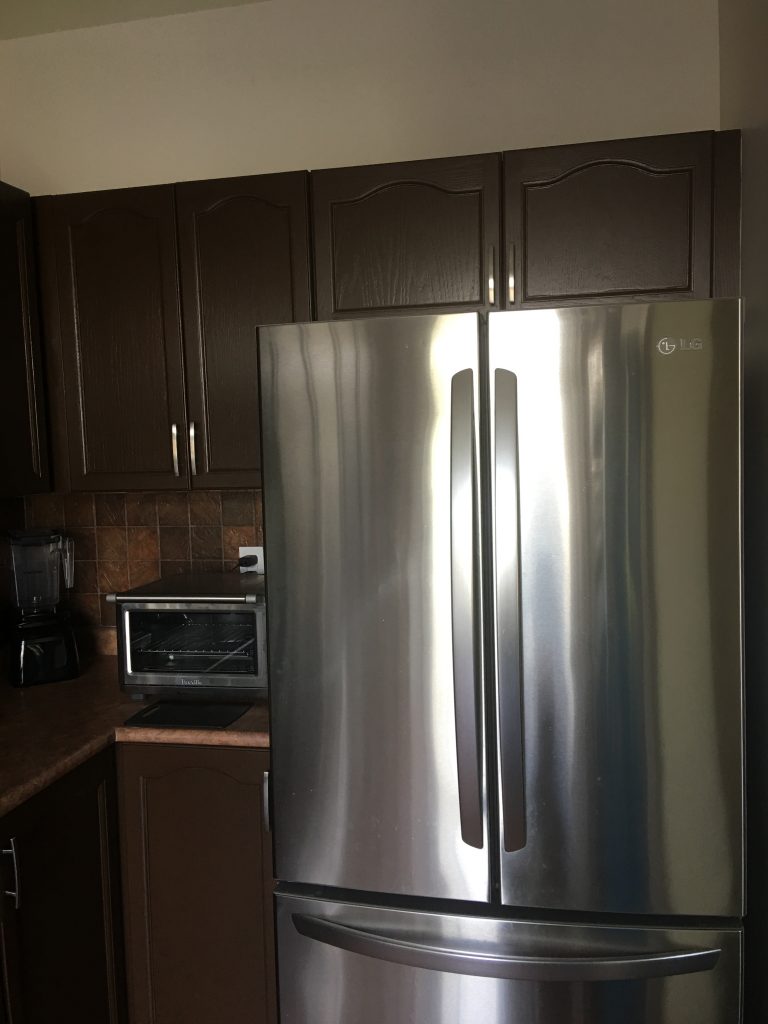
Since we didn’t plan on changing the laminate countertops and tiled backsplash, I decided to go with a brown finish. Normally I gravitate to rich dark colours, however I had to consider the existing kitchen surfaces and the rest of our home. I decided to go with the Chocolate finish and I’m defiantly happy with my choice. Not too dark and not too light, somewhere in between. Therefore we picked up the dark coloured kit, and the paint associate had to tint our BOND COAT. The BOND COAT is the actual paint colour that you pick as your new door colour.
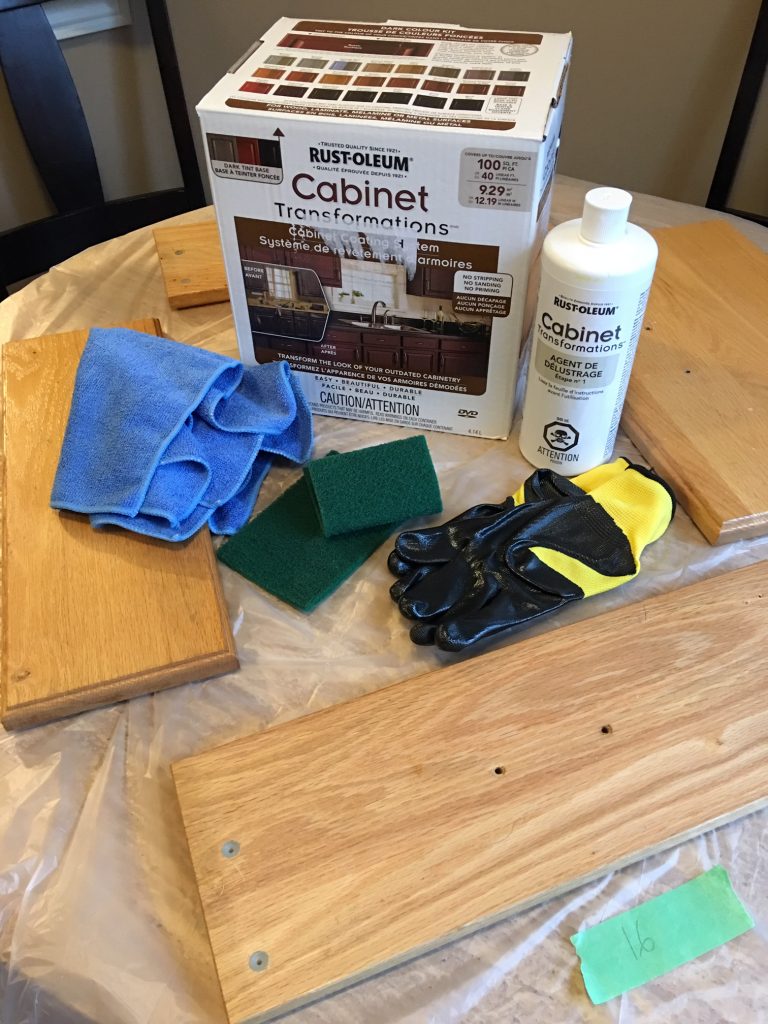
The kit comes with an instruction booklet and DVD to follow, yet the side of the box sums it up. First you need to remove all your doors, drawers and hardware. Make sure to safely place everything aside. If you choose, at this time you should number your doors and drawers to keep track of where they all go back in the end. I started by placing a blanket down on the floor near the kitchen for all the doors and drawers to sit on. Then one by one my husband and I began to clean them. That’s the first step, the kit comes with the DEGLOSSER and two scrub pads. The only thing extra we needed was a damp cloth, gloves and a large plastic bag to cover our working area. Just a side note, this liquid cleaner has a very strong odor, so make sure to use in a well ventilated area. Start scrubbing the solution all over the doors, drawers and wipe down with the damp cloth. This will leave your doors, drawers free of dirt and buildup and ready for the next step.
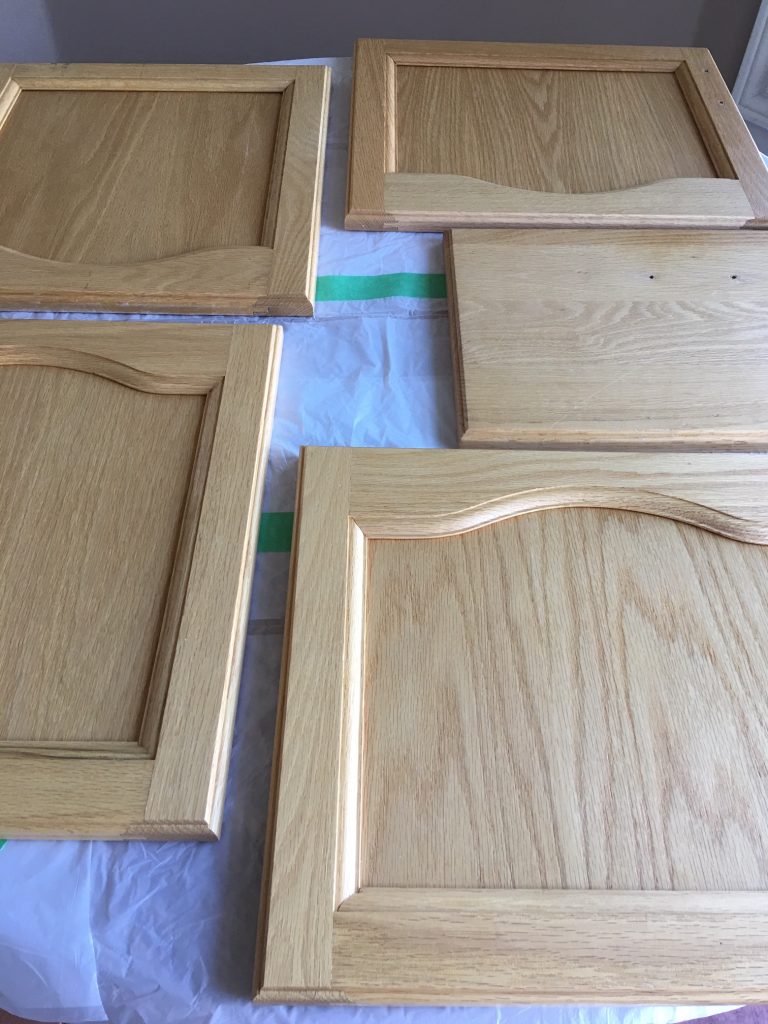
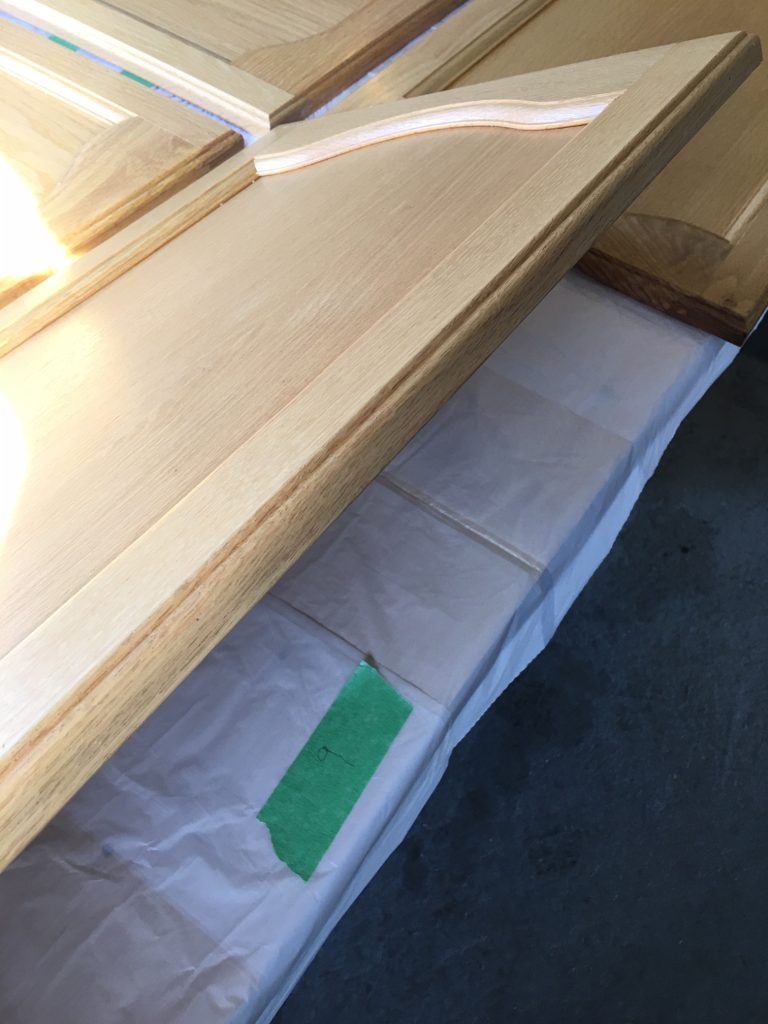
It took us about 3 hours to thoroughly clean all the doors, drawers, front and back. Make sure to also clean all the edge banding and panels that can’t come off and the toe kick too. The next day we set up shop, organizing all the doors and drawers on tables lined with plastic. Some in the kitchen some in our dining room and some in the garage even.
Then once your done you’re ready to paint, my favorite part. The BOND COAT is the defiantly the easiest and most enjoyable part of all the steps. The only thing extra you need for this step are good paint brushes. I made sure to flood the corners of doors first then proceed everywhere else. If you do see any extra paint build up or drips of paint, make sure to brush it away so that it won’t dry like that.
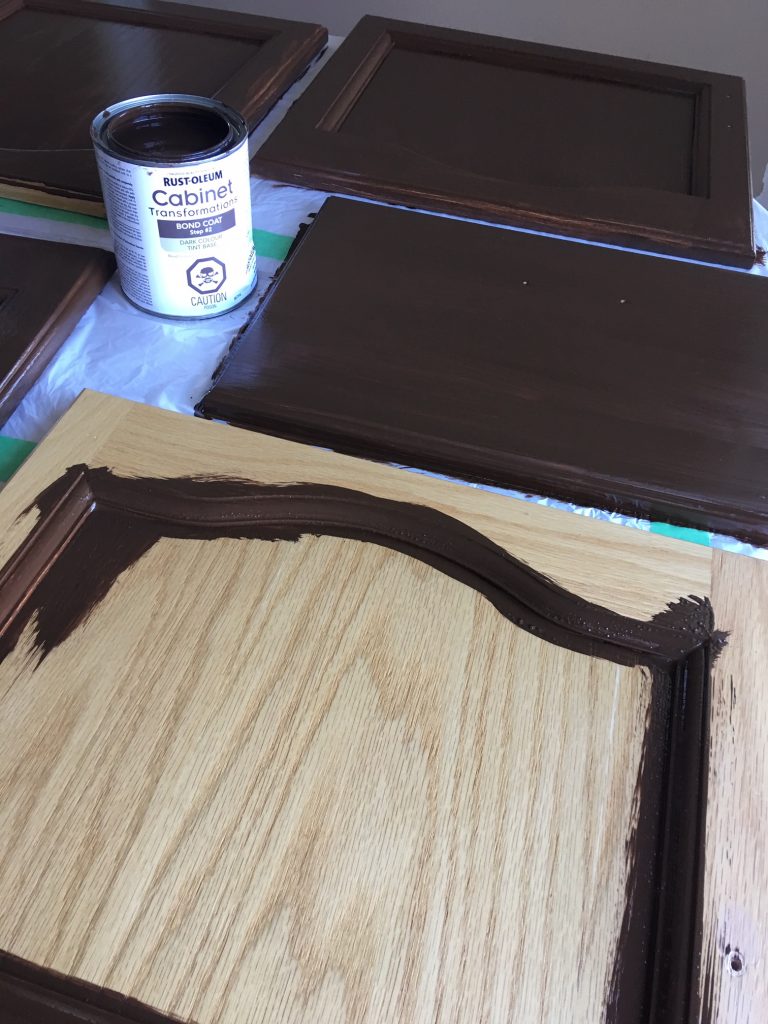

Above is a picture of some doors with one coat of paint. As you can see they need another coat for full coverage. Once we finished the first coat we went back to the beginning where we started and continued on with the second coat. This was done in one day, along with painting the edge banding etc. as seen in the picture bellow.
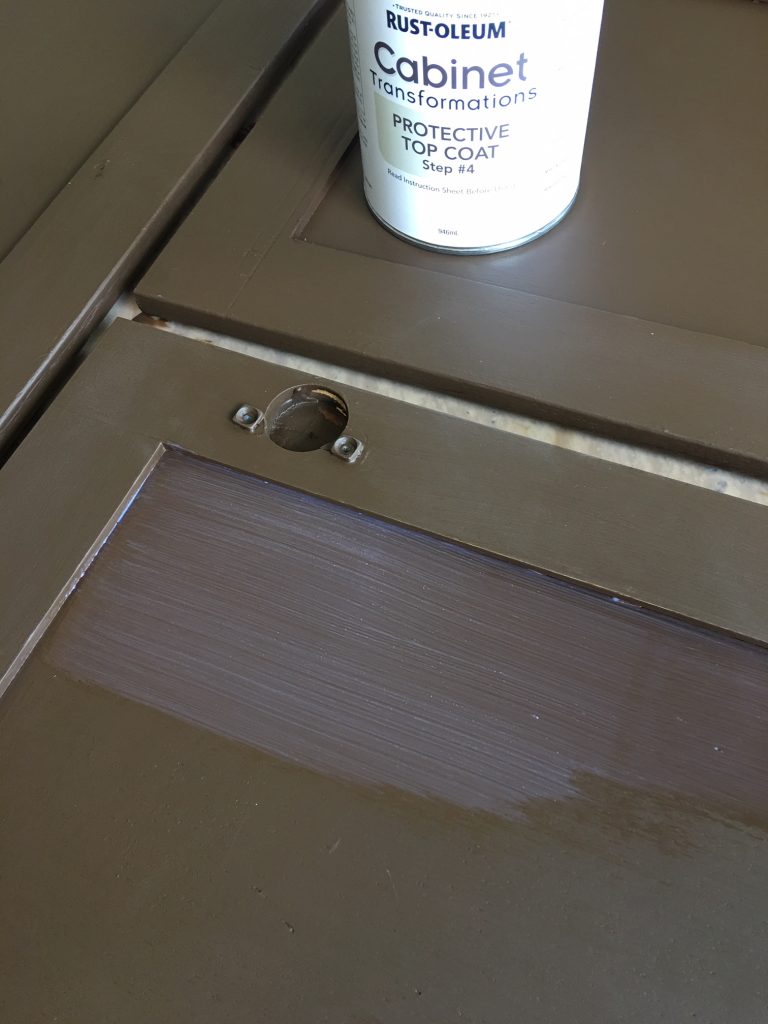
Once our second coat of painting was done it was time for STEP #3, which we skipped. This step, is the DECORATIVE GLAZE which is optional and I personally didn’t want my cabinets to be super shiny. STEP #4, PROTECTIVE TOP COAT is obviously a must and I started this step the next day. This step is tedious and requires a lot of patience, you basically have to develop your own technique to applying this coat. I recommend you start on the back of a door first, to get a feel for it. Take your time and thoroughly go over the door with the topcoat for full coverage, or you will have to do it all over again. Not just the spot you missed but the whole section. Yes, speaking from experience it shows where you touched up, this coat dries super fast and you have to work super fast too.
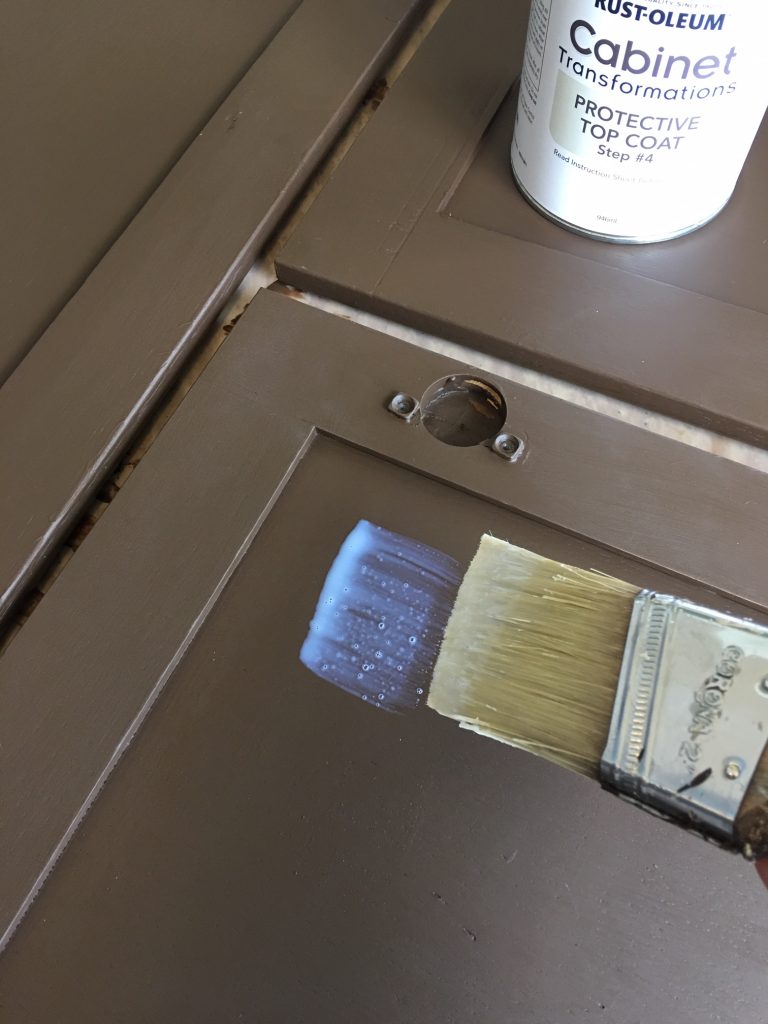
Once you’ve dipped your brush in the TOP COAT, place it down on the door panel about an inch away from the frame. If you have a slab door, you can just go right to the edge. However since our doors have a frame, I found that if I started right in the corner it would create a build up of the TOP COAT. I also found it harder to disperse, even with using a dry brush to remove. This coat is tricky, you want to remove the access, or it will dry whitish. As you can see from the photo above, this TOP COAT goes on white and is so pose to dry clear if you’ve applied it correctly. Another thing you must make sure to do, is to remove the bubbles created when you make a brush stroke. You do this by quickly going over the same area with your brush until you see no bubbles. The photo above and bellow shows the bubbles that I’m referring to.
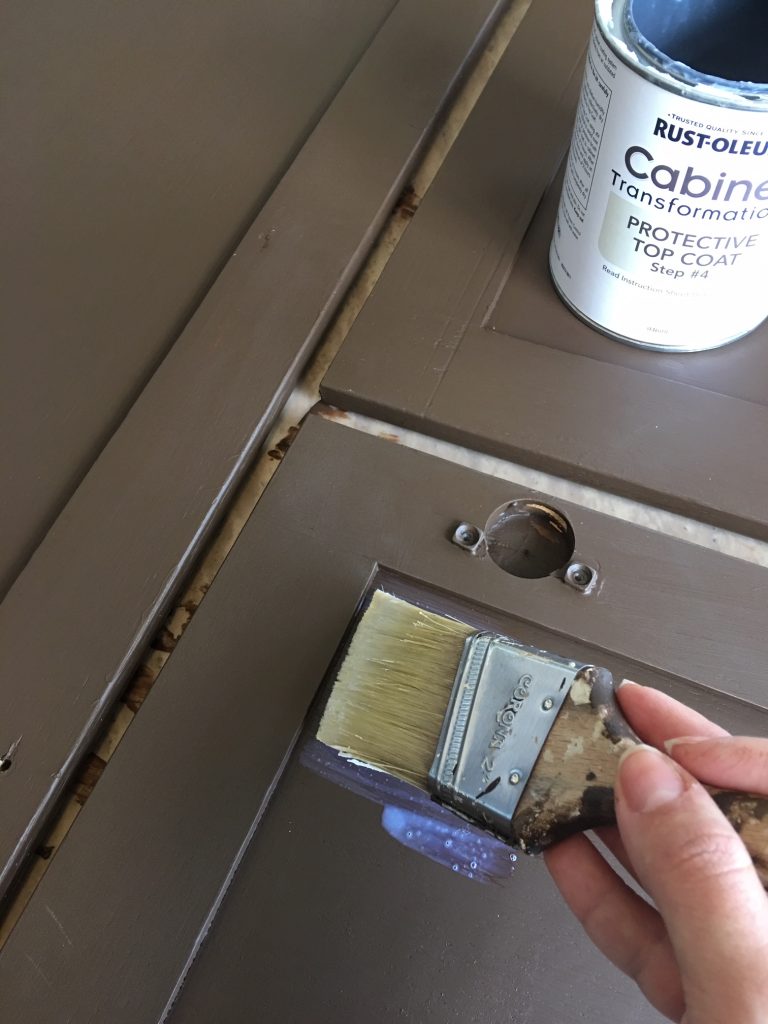
Then take your brush all the way to the edge where the panel meets the frame, from there make a brush stroke back the other way until you reach the other end. Dipping your brush into the TOP COAT frequently to help maintain proper coverage. Continue same technique until you finish the entire panel. Once your done that, you can proceed applying the TOP COAT to the frame, one section at a time since it drys fast. I recommend you also have plenty of time and no children or animals around for this step.
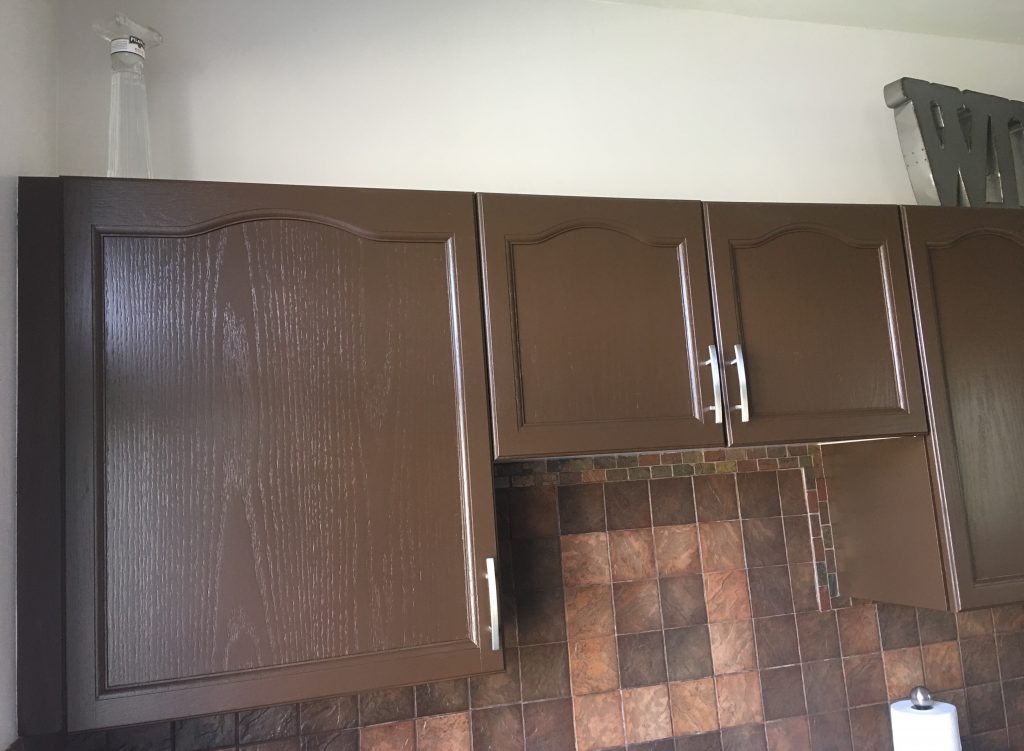
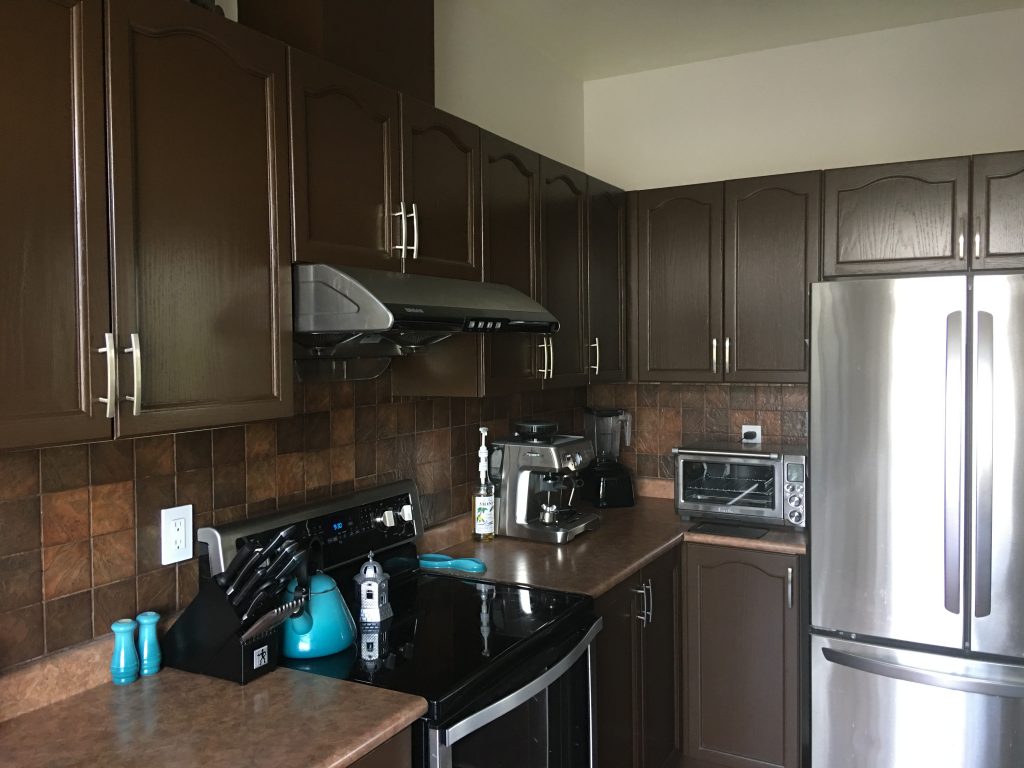
Once the last step is over, you simply have to wait for it to dry overnight. The next day you can finally put up your doors, drawers and add your hardware as well. In our case we used our existing handles. Once everything was up and I took a step back, I was truly blown away at what a difference it made. It felt and still feels like we got a brand new kitchen put in, without the inconvenience and cost of new cabinets. Don’t get me wrong, if I could I would love a new kitchen from scratch. However for now, I am truly pleased at how our kitchen turned out.
I also changed the wall paint colour, and what a difference that made too. Since I went dark on the cabinets doors, I wanted a paint colour that would help brighten the room. I ended up picking a colour called Whitish Clay by SICO, from their Muse collection. The baseboards and trim around the window and patio door needed a new coat of paint as well. For those I used the same existing colour, White Chocolate by Benjamin Moore. All our hard work in the end paid off, in return our kitchen received a wonderful facelift.